 |
| ELA in Middle School on BOOM! |
Creating a Card - The First Step to Creating a Deck
Seems kind of obvious, doesn't it? Actually, it isn't the first step. Step one is to go to Boom!Learning and establish an account. NOTE: IF YOU PLAN TO SELL BOOM CARD DECKS, YOU MUST HAVE THE $35/YEAR SUBSCRIPTION. Once you have the account, then you can start to create the cards and decks. Sarah Renish did a great job of explaining the "why". Now we will deal with the "how" of building the cards. We have two ways of creating Boom! Cards. The first is directly on the Boom site in the Studio Tab, which we will use regardless. The other is to create the backgrounds in...you know me too well...PowerPoint or Slides, and upload these to Boom. This is what we will be doing.
We will start by creating our slide in PowerPoint. Open a new presentation, and click on "Design". Click on "Slide Size" , then select "Custom Size". Set the sizes to 5" high and 7" wide.
 Next, we are going to delete the existing text boxes and select "Format Background". We are going to use a solid fill. For this one, I am going to use this gray. Now, what happens next may seem counter-intuitive, but we are NOT going to start with a cover slide. We are going to go directly into the slides our students will be using.


So far, it is a fairly standard, aka "boring", slide. Not much we can do with the information, so let's do something with the graphics. Let's add a Teacher 'Toon from Ron Leishman's Digital Toonage "Teachers" set. We are also going to add an arrow in the lower right corner.

And let's finish this slide background with a nice contrasting yellow boarder...

Much better! Now, we are going to pretend that we have created about 9 more direct teaching slides. I change the background colors and the cartoons on my slides throughout the deck, but all of the direct teach have the information in place. With one exception. Those of you who have read my earlier posts will remember that I say to add your copyright to EVERY slide. We will, but that will be a later step!
Now we are going to get into creating the task cards. With Boom! Cards you have a number of different interactions that your student-scholars can engage in. We have simple multiple choice; choose all that apply; true/false; click and drag; fill in the blank short answers; and others. I will let you explore those. For our example here, we will use just a simple multiple guess.

Note that we are NOT adding the answer options here. We will, however, add one of Ron's SchoolKids 'Toons, specifically "Many Questions". We are also removing the arrow!

After we create 15 to 30 interactive task cards (or as many as your heart desires), we are going to create a cover, like this one. The cover will be our LAST slide, not first. Next we save the slides, and export them as PNGs.
 Scroll down in the studio and click on the "Images" icon on the upper right of the set of six icons.

 Now, use the blue back arrow on the Boom page, and go back to "Studio". Scroll down and click on "Make Decks". You will get this screen.
 On the left side, under the first "Blank" slide, which is "Template", click the + sign to add slides. If you click fast enough, it will prompt a box asking how many more slides. You need to make enough blank slides for each of the PNGs EXCEPT your cover.
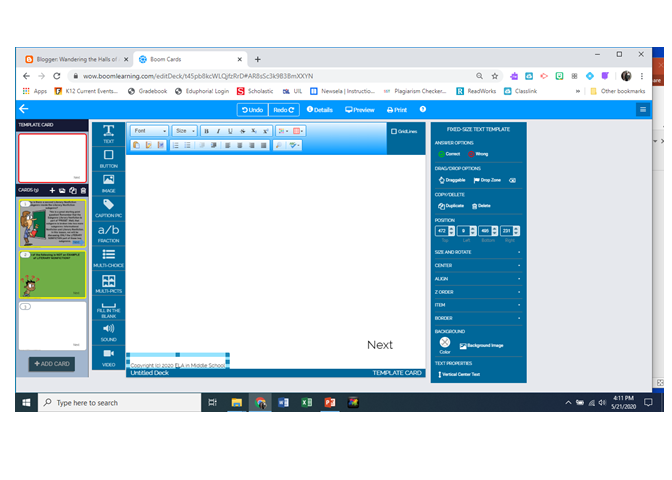
 Go to each blank slide, and click on "Background Image" at the bottom of the right hand blue column. For each "Background Image" take the next numbered slide. NOTE: They will NOT be uploaded in order. Now, on your template add 2 text boxes. One will say "NEXT" and the other will be your copyright. Place the "Next" in a position relative to your arrows on the instructional slides. Place the copyright relative to your frame.


Last step. Click the "About" tab in the upper blue border. This is where you will enter all the information you want to give potential customers. NOTE: VERY IMPORTANT! Set your price in Points IMMEDIATELY. If you forget this, you are making it free. This can be very costly. Trust me on this one.
 You will also give credit in the "About" tab, and the "TpT/Other" tab is where you will get the links you will use for your previews and products. One will say "Preview Link" and the other "Product Link" - I love user friendly. Place these in your respective PDFs for your sales platform.
Remember, you will NEVER download a deck - nor will your customers. What they are purchasing from you is the link access to your deck on the BoomLearning platform. Decks CAN be printed if a teacher needs to do so, but it is printed from the Boom site, or cloud, or whatever that magical bag of holding is called.
Play with the platform. Learn about it. Read Sarah's post here to see how she uses it for data informed delivery. Then, enjoy! I hear there may be a surgeon's general warning coming down: Creating BOOM! Decks may be addictive...
Oh, hey! Did we forget to save our deck? Nope. Boom! saves it automatically!
Boom Learning has educational videos for teachers and authors at http://www.YouTube.com/c/boomlearning
We will start by creating our slide in PowerPoint. Open a new presentation, and click on "Design". Click on "Slide Size" , then select "Custom Size". Set the sizes to 5" high and 7" wide.


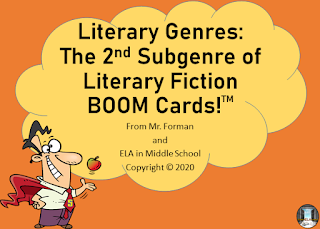
Slide one is going to be a direct teach slide, introducing our topic. This Boom! Deck is going to be about the sub-subgenre of Literary Nonfiction. Our students have already learned about the Genres of Poetry and Prose, and that Prose is separated into Literary Fiction and Literary Nonfiction. They have also learned that Literary Nonfiction is farther subdivided into Informational Nonfiction and Literary Nonfiction - which is THIS deck. If you are NOT an English teacher, and you find this confusing, don't worry. So do we.
Anyway, we will now start our direct teaching slides by asking and answering the question, "Why is there a second Literary Nonfiction subgenre?" I am actually using two separate text boxes, and two fonts. Personal choice here, you do you.

So far, it is a fairly standard, aka "boring", slide. Not much we can do with the information, so let's do something with the graphics. Let's add a Teacher 'Toon from Ron Leishman's Digital Toonage "Teachers" set. We are also going to add an arrow in the lower right corner.

And let's finish this slide background with a nice contrasting yellow boarder...

Much better! Now, we are going to pretend that we have created about 9 more direct teaching slides. I change the background colors and the cartoons on my slides throughout the deck, but all of the direct teach have the information in place. With one exception. Those of you who have read my earlier posts will remember that I say to add your copyright to EVERY slide. We will, but that will be a later step!
Now we are going to get into creating the task cards. With Boom! Cards you have a number of different interactions that your student-scholars can engage in. We have simple multiple choice; choose all that apply; true/false; click and drag; fill in the blank short answers; and others. I will let you explore those. For our example here, we will use just a simple multiple guess.

Note that we are NOT adding the answer options here. We will, however, add one of Ron's SchoolKids 'Toons, specifically "Many Questions". We are also removing the arrow!

After we create 15 to 30 interactive task cards (or as many as your heart desires), we are going to create a cover, like this one. The cover will be our LAST slide, not first. Next we save the slides, and export them as PNGs.

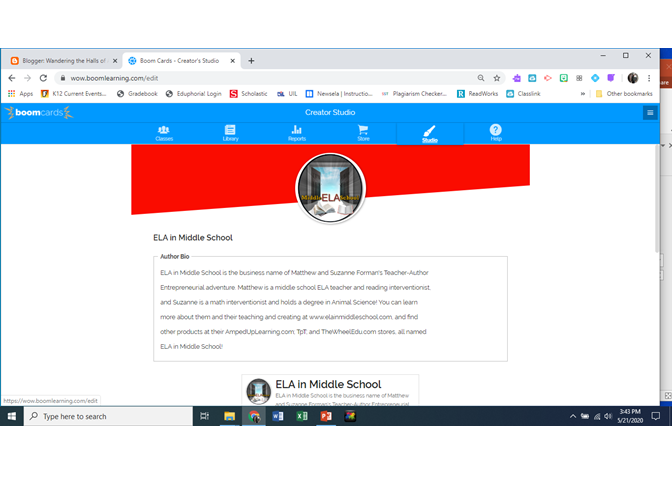
Now, open your BoomLearning account, and click on Studio. It will look like this.

Create a new folder, and name it whatever your Boom Deck will be named. Click on "Upload Image" and upload all of the PNGs.


Next, on each instructional frame, highlight the text box that says "Next", and click the "correct" button in the answer options section of the right column.

Go into each of the task cards and REMOVE the "NEXT" text box. You will have to play with the text boxes to get to where you can quickly unlock these.

Now, we will pull in a Multiple Choice button from the left column. You will see that it automatically places the correct answer in the upper left corner. As your students go through the deck, these will be moved about randomly, so do't worry about changing these. The only reason to do so is if you decide to have more than one correct answer. Then you click on each answer block to set if correct or not.

Enter your answer choices! Now, I like to mess with the sizes and backgrounds on the answer choices. Your choice. Play with the settings in the right hand column.

Last step. Click the "About" tab in the upper blue border. This is where you will enter all the information you want to give potential customers. NOTE: VERY IMPORTANT! Set your price in Points IMMEDIATELY. If you forget this, you are making it free. This can be very costly. Trust me on this one.

Remember, you will NEVER download a deck - nor will your customers. What they are purchasing from you is the link access to your deck on the BoomLearning platform. Decks CAN be printed if a teacher needs to do so, but it is printed from the Boom site, or cloud, or whatever that magical bag of holding is called.
Play with the platform. Learn about it. Read Sarah's post here to see how she uses it for data informed delivery. Then, enjoy! I hear there may be a surgeon's general warning coming down: Creating BOOM! Decks may be addictive...
Oh, hey! Did we forget to save our deck? Nope. Boom! saves it automatically!
Boom Learning has educational videos for teachers and authors at http://www.YouTube.com/c/boomlearning
Excellent article! Thank you for making it so clear and easy to follow. Love your work
ReplyDeleteCraig, thank you! Glad you were able to follow the guides! I sometimes worry that I make them too long or detailed.
Delete